Tuesday, October 22, 2013

Pontoon Ideas!

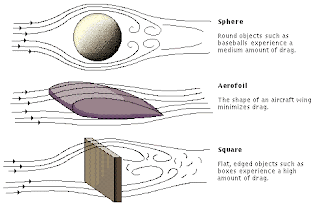
1. Changing the shape of the pontoon so that it is thinner and will not be able to fill up with water. For instance, making a flatter and thinner pontoon that resembles more of a sheet than a pod (like the current pontoons) would avoid the problem of them filling up with water. However, with this design its important to keep in mind that we have try to keep the design as aerodynamic as possible so that it doesn't negatively affect the speed of the rowers. Because of this, at least the top of the sheet would probably have to be curved.


2.  Keeping the design of the pontoon but changing it so that it is no longer hollow. The material therefore would have to be changed and would need to be something light that would be able to stay on top of the water, such as foam. We'd have to coat it in a waterproof material and if we did end up using foam we'd have to work on its sturdiness.
Some waterproof coatings to consider:http://tkocoatings.com/tuff-kote.html

3. Keeping the shape and the hollowness of the pontoon but changing the outside material. This is the simplest idea and would basically entail coating the original pontoon with a waterproof coating such as Neverwet (http://www.youtube.com/watch?v=DZrjXSsfxMQ). However there would be many things to keep in mind if we followed through with this such as water pressure on the coating and if/how the coating affects the speed of the rowers.

Tuesday, October 8, 2013

Adaptive Rowing

Adaptive rowing has allowed people with disabilities to enjoy rowing with the help of modified rowing techniques and devices. For instance, in some adapted boats the seats have high backs are fixed to support the lower and upper back. Depending on the type of boat, some seats can allow for more movement than others.
Paralympic design: adaptive rowing equipment
Another device that aids those with disabilities are pontoons which are floats that can be attached to the riggers in order to help rowers who don’t have control of their lower bodies to keep the balance of the boat.
Paralympic design: adaptive rowing equipment
The transfer board is another device that accommodates adaptive rowers though it isn’t a part of the boat. It’s used to help rowers without control of their legs to get from their wheelchairs to the boat without any assistance. (To see how a tranfer board is used, see video here: http://www.frontrower.com/adaptiverowing.htm)

For possible project ideas, I’m interested in helping make the process of set up for the rowers easier. Specifically, I’d like to address the following problems: rowers need help bringing all their equipment to the docks and setting up and the current process that some rowers use (transfer boards) to get into their boats poses several problems. For the first, more than a physical device I think coming up with a standardized procedure like leaving the equipment already at the dock during the day would be apt. I realize that this in itself causes other problems but it’s a starting point. As cool as the transfer board is, it can give the rower splinters and abrasions. One way to address this problem is by making the board out of more touch-friendly material but still keep the sturdiness of wood. A third problem I’d like to address doesn’t fall under the same umbrella as the first two but is still related. I’d like work on creating grips specifically made for adaptive rowers so they don’t have use ones made for weight lifters.

Some questions I have for rowers include: What is the most annoying thing you have to deal with while rowing? Do you feel like there are any steps that you have to do to prepare to row that seem unnecessary? My questions for the coaches include, if you have coached non-adaptive rowing before coaching adaptive rowing what is the hardest thing that you had to accommodate to? What’s your favorite part of coaching rowing? For the staff, do you think it’s possible to make the set up process more independent of helpers and more dependent on the rowers themselves?

Monday, October 7, 2013

Being Wrong Response

Being Wrong by Kathryn Schulz is an eye opening read. It shows us just how wrong we can be but also what we can learn from our mistakes. Schulz manages to hit a wide array of topics from misremembered memories to heartbreak and how wrongness is prevalent in them all. Right from the start of the book, Schulz states that “wrongness is a vital part of how we learn and change. Thanks to error, we can revise our understanding of ourselves and amend our ideas about the world (Schulz, 5).” This mindset is one that is applicable to many different areas of life, including product creation. In fact, it exemplifies a key lesson we learn early on: to fail fast, which hopefully allows you to succeed faster.

Much like that first quote there are many instances throughout the book that relate back to many different fields of study. In one her chapters, The Paradox Of Error, Schulz is relating trying to prevent making mistakes to the idea of democracy but I also found that it had a lot to do with product creation. “Here, then, are some ways we can try to prevent mistakes. We can foster the ability to listen to each other and the freedom to speak our minds. We can create open and transparent environments instead of cultures of secrecy and concealment (Schulz, 311).”  When I read this, I was reminded of the importance of brainstorming in groups. It’s one of the best ways to get the creative juices flowing and while many absurd ideas will come out of the session it also can lead to many brilliant ones. By playing off of each other in the group, by being able to listen and speak, good ideas come forth. Similarly, it is important to accept that “undoubtedly something else will go wrong sometimes in the future (Schulz, 316).” While one main focus of product creation is to make products better for people to use we can’t expect that our first effort will be our best. Relating to the advice to not to fall in love with your first idea, or your tenth for that matter, there’s always something that could go wrong. It may work “well for awhile, and then an error occurs anywhere and reveals a flaw in your design (Schulz, 316).” This is an important lesson in product creation and one that much of the work is based off of. By continually trying to fix errors we come up with better products. Just take a look at technology, for instance. Companies are constantly trying to make better phones, laptops, appliances leaving the consumer with better choices.

From this seemingly never ending string of being wrong and knowing that what may seem right at the moment might eventually be proven wrong in the future comes a pessimism or uncertainty, as Schulz puts it. She believes, however, that it isn’t a completely terrible thing. Doubting ourselves “is the act of challenging our beliefs…This is an active, investigative doubt (Schulz, 319).” This allows us to see the world with curiosity, possibility and wonder. If we don’t acknowledge our fallibility of possibly being wrong in the now and most definitely being wrong in the future, we lose out on this sort of doubt. I believe that it is this doubt that drives people to want to create new and better products.

Saturday, September 28, 2013

Better Coffee Cup Lids

My group, which included Gabby and Sarah P., decided to make a new and improved coffee cup lid for this project. Originally, we had wanted to create a better coffee cup that was better insulated and that also had an attached lid. (It would be a part of the cup but still removable from the top.) However, we soon encountered problems with being unable to stack the cups that had permanently attached lids. So we ended up deciding to create just a lid that would be able to act as a coaster as well as a lid. So this meant that the lid needed to fit around the bottom of the cup as well as the top.
 We studied already made coffee cups and decided in order to accomplish this we would have to cut out the center of the lid and replace it with a deeper dish that allowed room for the base of the cup. 


We first wanted to make the base of the dish out of foam and the edges out of cardboard. After cutting out the foam and seeing how inexact the disk came out to be we chose to make it using the 3D printer instead. By making it with the printer we were able to create the base to be the perfect size and shape. 


Afterwards, we experimented with cardboard strips to fit around the plastic disk however soon came to realize that the cardboard wouldn’t slant to fit the cone-like structure of the cup. Instead, we decided to use card stock which was more flexible and was also thinner. Although card stock couldn’t fit the shape of the cup perfectly either, because it was more versatile we were able to layer strips of it with tape in the proper shape and then trim it to the height we wanted. We then attached to plastic base to the cardstock ring and then to the lid with the center cut out. Finally, we painted the cup and the lid purple to add some aesthetic appeal!


As a lid

As a coaster
The prototype process was different from what I expected. I knew that it wouldn’t be completely smooth sailing but I didn’t expect to have to change our idea for the prototype and our plans on how to make it so many times. Despite this, it was a very fun process and I really enjoyed having to think outside of the box to solve the problems that we faced. I particularly liked learning about and using the devices I haven’t before such as the 3D printer and the foam cutter.

Our Prototype:

Monday, September 23, 2013

MFDs

Norman’s Seven Stages of Action
Forming the goal:
Print something from a library computer using a multi-function device (MFD)
Forming the Intention:
Start off with clicking print with your mouse on the document screen. A pop up window will then appear on the screen a few seconds afterwards and you have to click Okay to send the document to the printer. You would have to then walk to MFD and use the keyboard and touchpad to type in your username and password. After this a window will come up indicating that you have x amount of print jobs waiting. Click okay and then the Release button. When the Release screen comes up, select the print job(s) you would like to print and then press the print button. Your documents should start printing now. Finally after you’re done, you have to press the access button and click okay in order to sign out of your account.
Specifying the intention:
In order to send the print job to the MFD you have to use the muscles in your hand to operate the mouse and the keyboard. You’d proceed to get out of the chair and using your leg muscles you’d walk to the printer. Using your finger and hand muscles you’d operate the keyboard and touchscreen connected to the MFD.
Executing the action:
Follow the intention specified.
Perceiving the state of the world:
Printed document comes out of printer
Interpreting the state of the world:
Printing job was successful
Evaluating the outcome:

Although the process was long and there were some unnecessary steps the goal was achieved and the pop-up windows helped move the process along.
Conclusion:
The process was pretty self-explanatory and after using it once, it’s easy to get the hang of. The pop-ups give you information about how to release print jobs and how to sign out. The process however is really long and there are numerous times that you have to confirm that you want to print which seems very unnecessary. If I say that I want to print something, I really do mean that I want to print that thing.

Needs Assessment:
Observe: Some students spent less than a minute at the MFD and walked away with their print job without a hitch. Fewer students spent a longer time at the MFD and occasionally had to walk back to their computers and eventually walked away with their print job. The rare student would tinker with the MFD and the computer they were using and eventually walked away without being able to print something. One thing that surprised me was how I didn’t see anyone ask for help when they couldn’t figure out how to use the MFD.
Try: After using the MFD the first time, I never had a problem with printing anything. I feel like the steps are easy enough however I never tried doing anything but printing. The people that I watched that copied things did not seem to have a problem though.
Ask: I did an individual interviews because I felt that group and expert interviews would take more planning to conduct. Also, I was interviewing other students and not faculty or staff members so I could afford to be a somewhat less formal. I was not interviewing people to find out about the product but rather to find out about other people’s experiences so expert interviews were not necessary. I chose a few random students at the Clapp library who had gotten up to print something and who did not look like they were in a hurry. (I asked to just to make sure.) They stated that they didn’t like having to wait to use the printer at certain times of the day and that the printing process was just too long in general. One student also stated that when something goes wrong it causes a huge inconvenience because students only know how to use the device to print and maybe copy things. If a problem arose they would have to call for help because their knowledge about the device is so limited. 

Mind Map


Solutions:
The main problems with the MFDs are that they make it unnecessarily difficult to print things and that because they are overly complex. One proposed solution is to include next to the MFD an easy and simple to read instruction booklet that not only describes how to do certain things but also had to solve common problems such as a paper jam. Another solution is to separate the devices so that one device is used to print, another to copy etc and have multiple printers and copiers around the room to lessen the wait time. This way the devices would be much simpler and less intimidating looking. Yet another is to shorten the printing process by getting rid of some steps such as having to validate the print job more than once.

Pugh Chart:


Sketches: 


Design of Everyday Things, Chapter 2

I found that I related to a lot that Norman stated in chapter 2 of The Design of Everyday Things and I thought that overall his thoughts and points were very well stated. One thing that really resonated with me was when he pointed out that when a task appears simple, people blame themselves. I have definitely done that a number of times and have been too embarrassed to say anything about it. Occasionally, after the fact, I’d find out that other people suffered from the same problem. It’s nice to have someone acknowledge that the fact that so many people having problems with it indicates a problem in the design and not in the users’ incompetence. Another part of the chapter that I found interesting is when he Norman mentions “mathematics phobia.” It’s something that I’m definitely familiar with and I really liked how he explained the way this “phobia” is developed.  It’s not that the concepts are particularly difficult but because each new lesson builds on the previous it is hard to catch up if you fall behind once.

Sunday, September 15, 2013

Milk Frother Disassembly

IKEA Milk Frother ($2.49)
This milk frother is supposed to be able to froth milk in 15 – 20 seconds however when I tested it, it took about 30 seconds to significantly increase the volume. Compared to the other IKEA milk frothers that my other group members tested however, mine performed very well. The other two took at least a minute to increase the volume and one could barely do even this. These varying levels of success indicates the milk frother’s poor quality. In terms of affordances, mapping and feedback, this milk frother had no exceptional problems. There was a switch to turn the frother on and off that used familiar mapping (pushing the switch up turned the device on and down, off). Visual feedback was immediate so if the milk wasn’t increasing in volume it was obvious that the device wasn’t working and it was clear how to hold the frother. Despite the fact that there weren’t any instructions, this milk frother was very easy to use. The frother that I had did its job satisfactorily and the simplicity of the device was great. However, the fact that not all the IKEA frothers could do the same is definitely a weakness. By disassembling this product I learned about the main parts that go into a simple device like this. I was actually surprised at the simplicity of the design.


Bodum Milk Frother ($9.99)
This milk frother claimed to take 25-30 seconds however when I tested it took 50 seconds to increase the volume of milk the same amount that the IKEA one did. Although it took longer, compared to the IKEA milk frother, the device was much quieter, smoother and did not splatter the milk as much. Similar to the IKEA one, this device had no problems with affordances and feedback. However, in terms of battery installation the mapping was very poorly done. It took us about five minutes to figure out how to remove the battery cover as there weren’t any clear indications on how to do so. This is definitely one of the weaknesses of the product. Its sleek look in addition to the aforementioned quieter functioning are definite strengths. Like with the IKEA milk frother I learned about what goes into making a simple device like this but I also realized that despite significant price differences, the parts that go into the different devices are very similar.


Both milk frothers had very similar parts although my group members and I came to the agreement that the Bodum milk frother had a slightly better quality spring and wand. However, we didn’t think that this was enough to account for the price difference. To summarize, the IKEA milk frother operated more quickly while the Bodum milk frother operated more smoothly (but also had poor mapping). Taking all this and the prices into account I would buy the IKEA milk frother over the Bodum one time and time again. Although the IKEA frother was not as smooth or as sleek as the Bodum one it performed its primary function better. The Bodum milk frother took too long and its smooth operating does not make up for it. Although not all IKEA milk frothers performed to the same standard with the money I’d save by buying the IKEA product I could buy three milk frothers and use the one that performed the best and still not spend as much money as I would have if I bought a Bodum device. (One thing that we couldn’t test but that is important to consider when buying such a device is how long each device would last. If there was a significant difference between the operating lives of the two it would definitely play a role in deciding which one to buy.)

List of  Disassembled Parts